Deploying Django with Github Actions and Docker
In this article, you will learn how to deploy your Django application to your VPS using Github Actions.
If you want to, you can checkout one of my Django applications here, where I have implemented the steps described in this article.
The main idea is that every time you create a “release”, Github will pick up newest release version and trigger a docker build for that release. The end result is quite amazing, because now you can simply run docker pull ghcr.io/<user>/repo:latest on your VPS to get the latest version.
The article assumes a moderate level of understanding of docker.
The Setup
Before we begin working with Github actions, make sure you have the correct configuration setup. Personally, I create an env folder in my project settings folder, as can be seen here. This folder can contain your production, developer and staging setup. In my my setup, I created a prod.py config file for running in production. Database credentials and so on are fetched via environment variables in my docker-compose.yml file. Make sure you set DEBUG=False when running in production mode.
Dockerfile
My Dockerfile is structured as followed:
 1FROM python:3.10-slim-bullseye
 2ENV PYTHONUNBUFFERED 1
 3
 4RUN apt update && apt upgrade -y && apt install -y \
 5  git \
 6  gcc \
 7  musl-dev \
 8  libffi-dev \
 9  make \
10  libxslt-dev \
11  dos2unix \
12  unzip \
13  procps \
14  && groupadd -r -g 997 burgarkartan \
15  && useradd -m -s /usr/sbin/nologin -u 998 -g burgarkartan burgarkartan \
16  && pip install --upgrade pip
17
18USER burgarkartan
19RUN mkdir -p /home/burgarkartan/project
20WORKDIR /home/burgarkartan/project
21COPY --chown=burgarkartan . /home/burgarkartan/project/
22RUN pip install -r requirements.txt -U --user && echo "export PATH=$(python -c 'import site; print(site.USER_BASE + "/bin")'):$PATH" >> ~/.bashrc
As can be seen in the first RUN step, I created a new user with the uid of 998. This ID corresponds to the ID of the same user I created in my host, using useradd -r -M -s /usr/sbin/nologin burgarkartan. Run id
root@Gambit:/var/www# ls -lh burgarkartan.se/
total 8.0K
-rw------- 1 root         root          561 Aug 13 23:15 docker-compose.yml
drwxr-xr-x 5 burgarkartan burgarkartan 4096 Aug 13 14:06 static
The static directory contains static files like CSS and JavaScript files which will be served by nginx. A crucial step in my docker setup is the entrypoint.sh script. It’s defined as the entrypoint and is used for running the Django application in either production or development.
Getting ready for Action
Once you are satisfied with your production configuration and your Dockerfile, it’s time to set up Github actions. To do that, I suggest following the article below, it contains all you need.Publishing and installing a package with GitHub Actions - GitHub Docs You can configure a workflow in GitHub Actions to automatically publish or install a package from GitHub Packages. https://docs.github.com/en/packages/managing-github-packages-using-github-actions-workflows/publishing-and-installing-a-package-with-github-actions#publishing-a-package-using-an-action
You should have something that looks like this. The next step is create a release.
Release the kraken
Creating a release in Github is super easy, head over to the release tab and click Draft a new release.

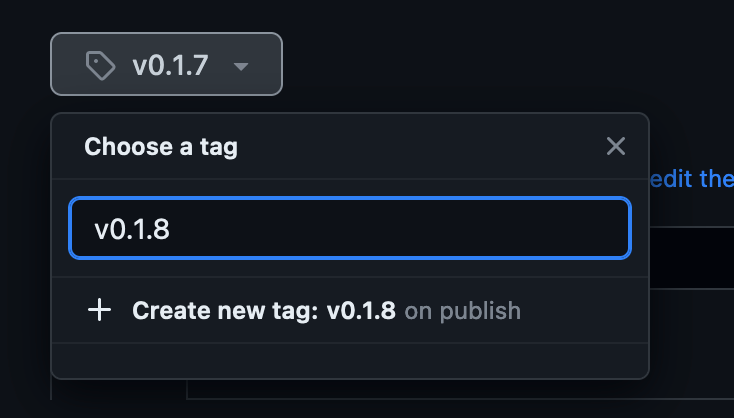
Now you need to enter a new tag for this release. In the image below, you can see that my previous tag was v0.1.7, but now I want to create a new release so therefore I need to enter a new tag.
Once you are done, hit Publish release. Now, Github should trigger a docker build and start building your latest release for you. Head over to the actions page, you should see your latest release being built. An older version of my Django app being built.

Running in production
Once the image has been built, you can start using it in your environment. Below you will find my production ready docker-compose.yml, as you can see, the image points to ghcr.io/dubs3c/burgarkartan:v0.1.7 which was the version built in the previous screenshots.
 1version: '3'
 2
 3services:
 4  burgarkartan:
 5    container_name: burgarkartan-prod
 6    image: ghcr.io/dubs3c/burgarkartan:v0.1.7
 7    command: bash entrypoint.sh prod
 8    ports:
 9      - "127.0.0.1:8001:8000"
10    volumes:
11      - "./static:/home/burgarkartan/project/assets"
12    env_file:
13      - /root/burgarkartan.se.env
14      - /root/burgarkartan.se.db.env
15    depends_on:
16      - postgres
17
18  postgres:
19    image: postgres:15.4
20    env_file:
21      - /root/burgarkartan.se.db.env
22    volumes:
23      - /var/lib/burgarkartan/postgresql/data:/var/lib/postgresql/data
Now it’s simply a matter of running docker-compose up -d, and your latest image built by Github should be downloaded. The end
Hopefully this was useful and that you now know have an idea on how could deploy Django applications with Github. If you have any questions, don’t hesitate to reach out on Twitter.